


Sometimes your equipment is so delicate, a square or circle that encompasses its perimeter is not enough. Sometimes you need even more customization. We hear you, and we want to help. How does a foam cavity that cradles every twist and turn on your equipment sound?
Interested? Good. The CasePro Designer’s Photo Trace Tool will get you custom foam that fits your product perfectly. Here’s how to use it.
- First make sure you are logged into you Cases By Source account! If you don't have an account already, create one here to be able to save your projects and photo traces.
- Click on the Photo Trace Tool on the left toolbar.

- Upload a photo of the first thing you want to put in your case. Your photo must be in JPG, PNG, or GIF format.

- Make sure there is only one object in each photo.
- The background must be plain
- The background must contrast with the object. For example, do not take a photo of a white object against a white wall; use a black wall instead.
- Make sure the photo is clear, not blurry.
- If you want to put your product in the case horizontally, take a photo directly across or above it like so:

- If you want to put your product in the case vertically, take a photo directly above the object.
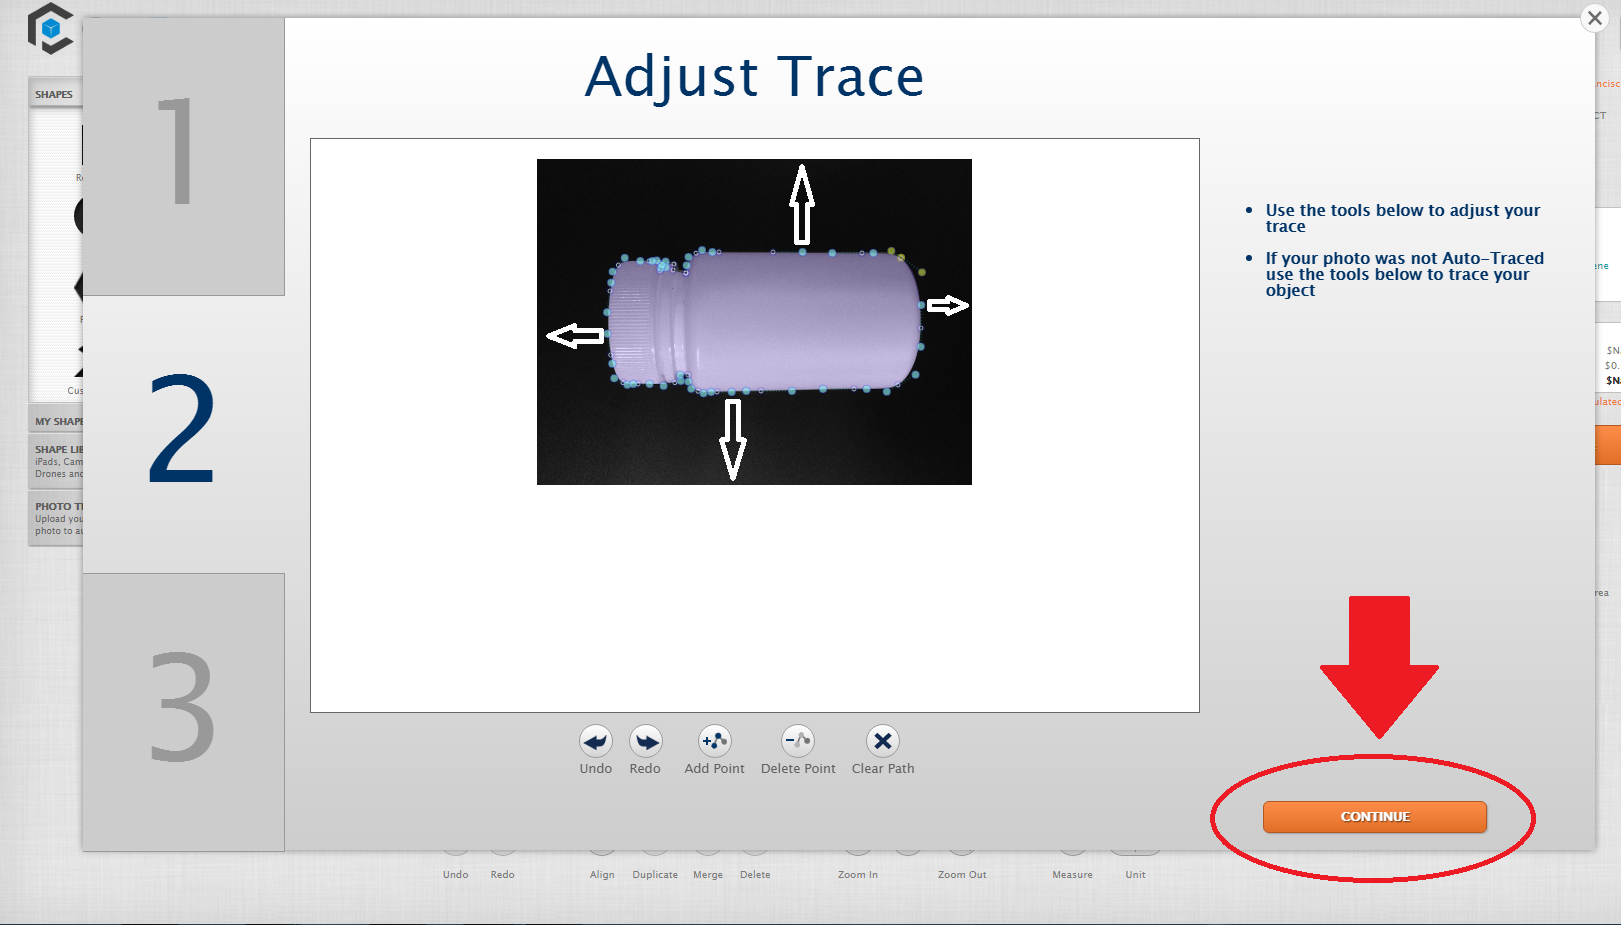
- For purposes of this tutorial, I will assume the bottle will be put into the case horizontally. After you’ve uploaded your photo, sit back and wait for the magic to happen! Once the Tool has auto-traced your photo, it should look like this:

At this point, you can click on any of the dots on the perimeter of your product and drag them outward or inward in case you think your product needs more or less space in the cavity. When you are satisfied, click the orange “Continue” button on the bottom right. My photo wasn’t auto traced!
Not to worry, next week, I will ake you through the steps of mnually tracing your object! - Measure and record your product’s length from left to right, as shown below. This is the most important part. These measurements accurately scale your trace.

- Measure and record your product’s depth, like so:

- Once you’ve filled in your product’s name, depth, and length at the bottom of the tool, click the orange “Add Shape” button.

- Click “Okay,” select your shape, and it will appear on your canvas. It is also added to “My Shape Library,” which stores your traced shapes for future projects (provided that you have an account with us).

- You can now click and drag your custom shape to whatever position you like within the gray area. If you have more than one of the same object to put into the case, just use the Duplicate button on the bottom toolbar to clone your custom shape. When you are satisfied, click the orange “Order Case” button on the right.
If your objects are just too complex for generic foam cavities, don’t take any chances. Use the CasePro Designer to make sure every single line and curve of your object is cradled gently and protectively. Click below to try it today!


Leave a Comment